After a week of hard work, I finally burned the program. After this week, I must do two things. One is to study the code well, and the other is to study the manual. I don't know the chip, I have gone through a lot of detours, and I will leave a lot of inexplicable problems.
text:
1. The MCU used by the small steel gun is STM32F401RET6. The common programming methods of stm32 are JLINK, ULINK, STLINK and serial port. According to the manual of “stm32F401xEâ€, you can also use USB OTG, I2C and SPI. The program is downloaded to the Flash of the MCU.
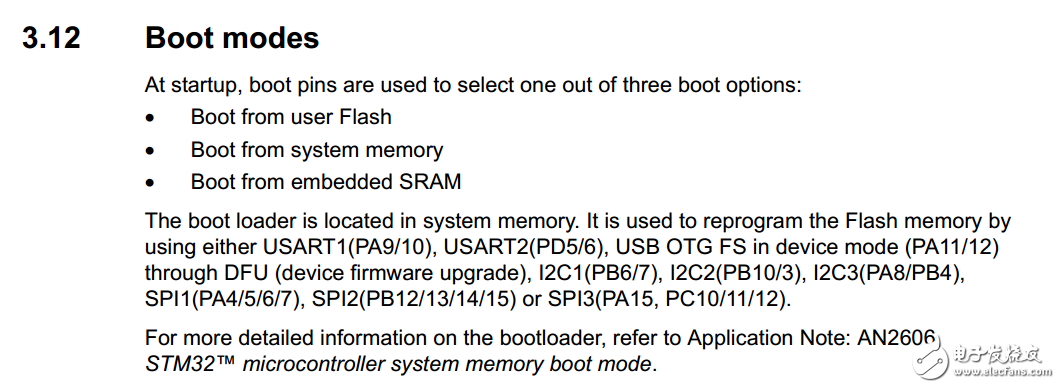
Introduction to Boot modes in datasheet
2, I used the U disk version of the stlink V2 writer to download the program to the board during the learning process. Here is a detailed introduction to the whole process of programming.
2.1, hardware connection
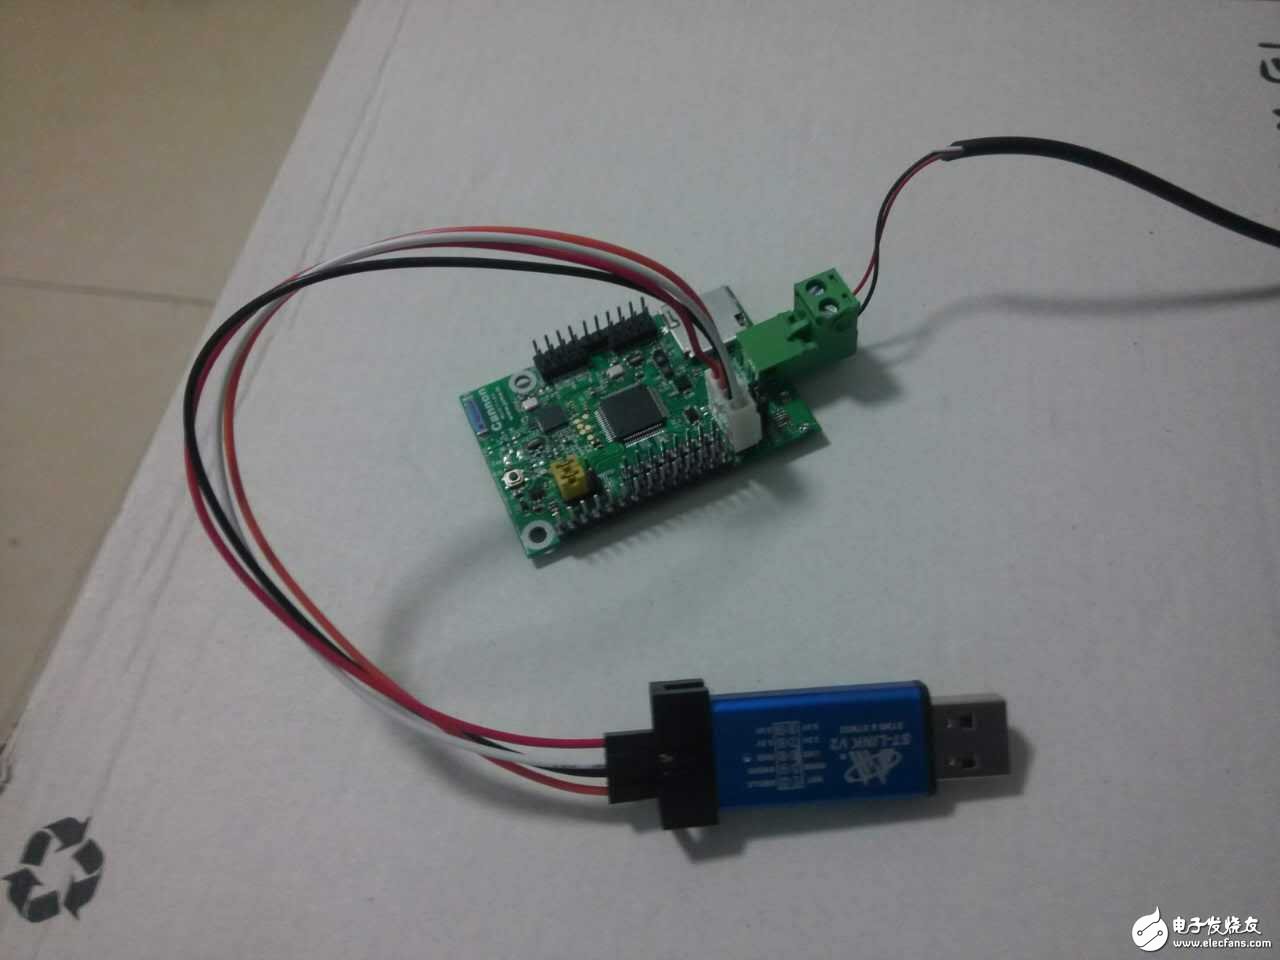
Note: The figure above is the hardware connection diagram, the blue is the U disk version of the stlink V2 version, the use of this writer does not need to connect the external power supply, in the above figure, although the P12 port is connected to the line, but there is no connection power, here P4 The jumper cap on the port can be connected or not. From the schematic and actual test, the jumper cap is only needed when using USB or P12 port.
Here, the pin header corresponding to F1 is the control jumper for controlling the Boot mode. When this connection is made, BOOT0 and BOOT1 are both connected to the GND side. Here, for the STlink connection, connect the Stlink VCC3.3V according to the schematic diagram (remember not to connect to 5V, otherwise there may be danger of burning the film.) The four lines SWCLK, SWDIO, GND are marked in the stlink V2 version of the U disk version, so I won't go into details here.
2.2, software settings
First, download the source code of the small steel gun, here is no longer available to download the address, open the development environment (the environment has been introduced in the previous post), import project (project--"Open Project --" "pop-up dialog box "---" find the project file). 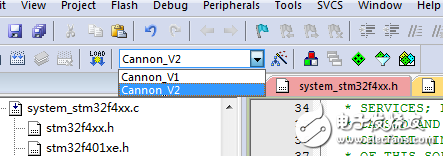
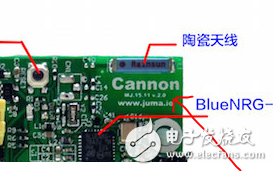
At this point you can see the situation in the above picture, here we choose cannon_v2, where V1 and V2 represent the code of the corresponding different versions of the hardware, the board I got here is the V2 version, (see the hardware version, please refer to the figure below) Red arrow refers to the location)
Then, compile, after the source code is imported, set the compiler and the environment, project--"Options for Targets" cannon_v2", or directly click the button as shown below to enter the setting interface.
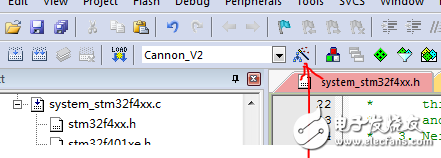
Many posts here have already described the setup process. I will not describe it here. I will only mention the precautions here.
a. It is recommended to connect stlink to the USB and identify the driver before setting.
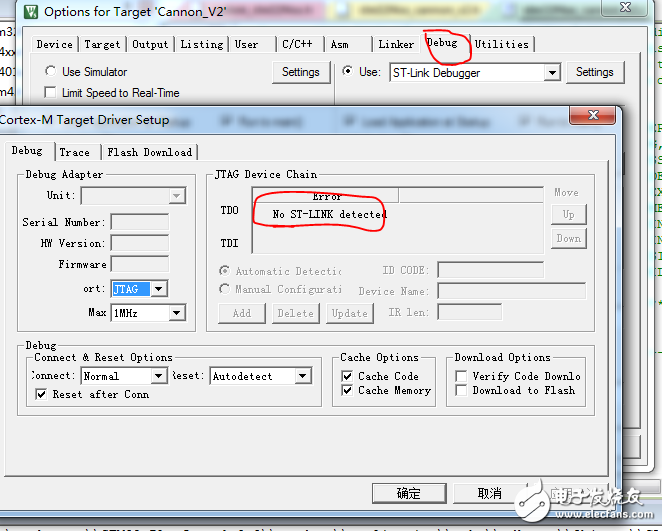
b. When setting the debuger option, click on the setting and the following interface will appear. If you have connected the programmer and are correctly identified, you should not prompt “No ST†as indicated by the red circle in the JTAG Device Chain option. -LINK detected", if the above prompt appears, the ST-link is not recognized properly.
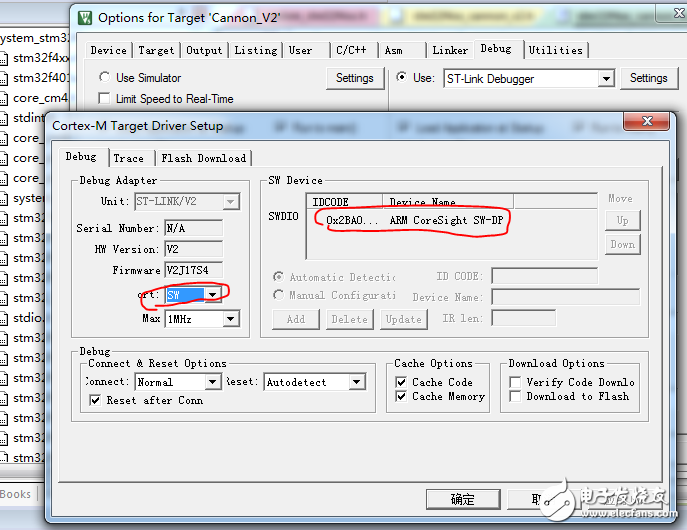
c, Ort (optional for blue background), JTAG for ST-link information, SW for target board information. There are only two options. When the JTAG Device Chain option indicates that the device is connected properly, the program can be downloaded to the chip normally.
After the above settings are set correctly, click Recompile to ensure that your binary code is up to date.
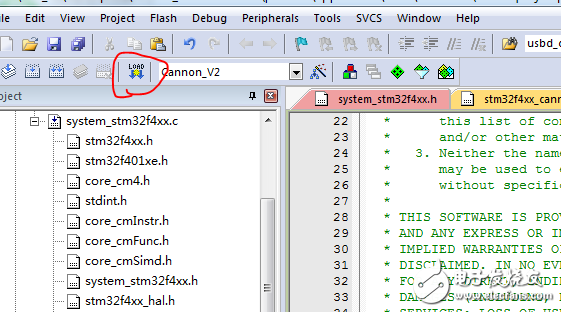
Finally click the download command button to download the program to the board, the red circle button
The problem encountered during the process:
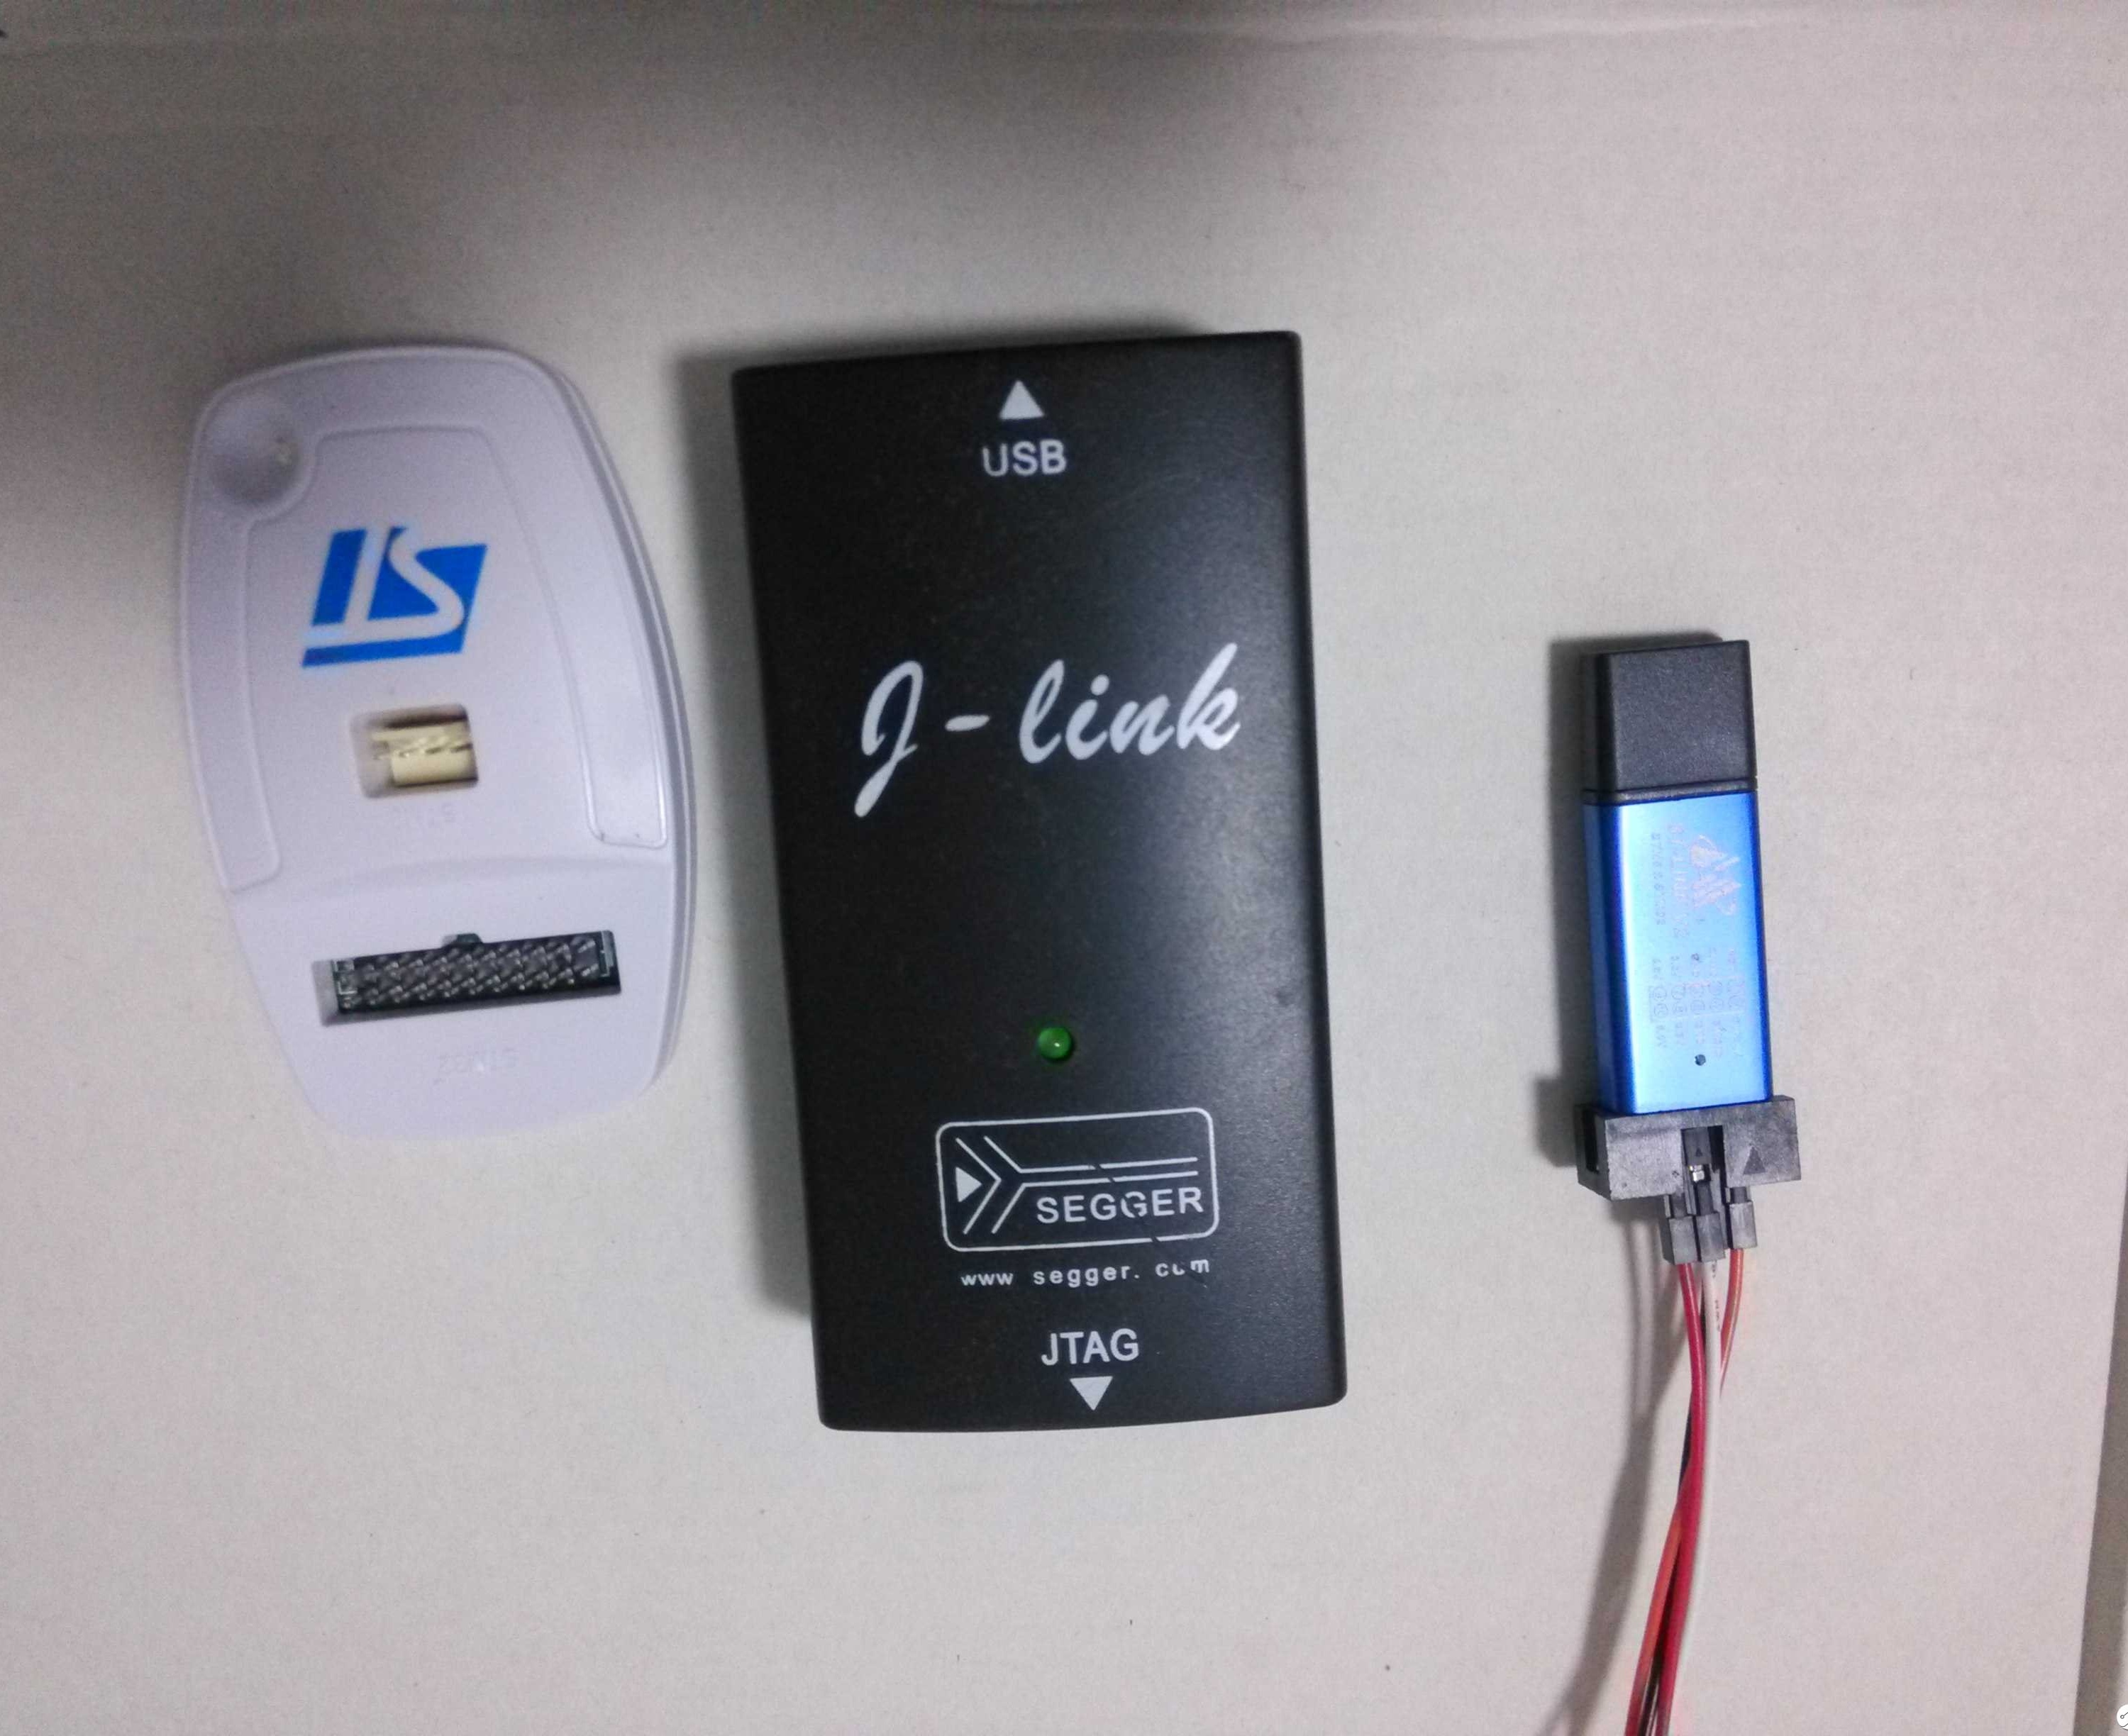
1, stm32f401 can download the program to flash through serial port, stlink, Ulink, Jlink, etc. Here I also tried to use jlink to download the program, but did not succeed, the main reason is that the JLINK version used is too old (2010 Bought, the previous friends left), speculated that the firmware of the V7, try to upgrade the firmware to V8, but without success, the software is always unrecognizable, here speculation may have been broken. The latest version of JLINK is V8. When I learned from the merchants, JLINK has basically stopped production. The genuine licensed products are generally ¥2000.00. The products sold in the market are all pirated. The price is also from ¥95.00~¥200.00. JLINK ARM's support is the most comprehensive, and generally, if the budget is available, it is recommended to purchase JLINK. Since I already have one in my hand, although it is not good, I think it should be that I did not figure out the upgrade process of that thing, so I did not buy JLINK.
2, the Internet is recommended to use stlink for stm32. This type of emulator is divided into two types: the normal board (the white burner in the figure below), and the other is the st. Writer). The normal version of the online price range, from more than 20 yuan to more than 200, there are more used, the U disk version of the stlink price is generally more than a dozen to forty. Both of them are V2 versions in terms of firmware version, but in terms of feedback from actual users, the white failure rate is higher than the blue failure rate. Here I see the feedback from the forum. The white programmer needs to supply power to the outside of the board when it is used, and the blue is not used. I spent 60 oceans and 30 pieces to buy these two types of writers. Through actual use, I personally recommend the U-version version of stlink. This version does not need to supply power to the board, and the price is low. The white stlink has been used. I haven’t succeeded, I don’t know if it’s broken, or I’m having problems with my operation.
3, according to the manual, stm32F401 chip can also use the serial port or I2C, SPI bus way to program the program to flash, I looked at the schematic diagram of the small steel gun, found that the board does not have such level as MAX232 Conversion chip, because I still don't understand the electrical parameters of the stm32 serial port, here I did not try the serial port programming method, so as not to damage the board due to my own recklessness. If you have a senior who knows how to write this way, I hope you can share your experience or recommend relevant posts to me. Thank you in advance.
Finally, to say a little personal suggestion, miniUSB's welding strength is not enough, it is very easy to damage, I just tried to use the USB connection, inadvertently being smashed, and then try to solder back, the strength is still not good, and eventually lead to PCB pad damage, Now it is no longer possible to go back in the welding. I hope that the board dealers can pay attention to it.
Smart Socket,Tower Socket Products,Three Lay Tower Socket,Eu Type Smart Plug
Yuyao Huijun Electrical Appliance Co., Ltd. , https://www.yyhjdq.com